Modern text rendering with Linux: Part 1
Introduction
Welcome to part 1 of Modern text rendering in Linux. In each part of this series we will build a self-contained C program to render a character or sequence of characters. Each of these programs will implement a feature which I consider essential to achieve state of the art text rendering.
In this first part I will show how to setup FreeType and we will build a console character renderer.
This is what you will build. And here is the code.
Setup
- My operating system is
Ubuntu 18.04.2 LTS (bionic) - My C compiler is
clang version 6.0.0-1ubuntu2
Installing FreeType
On Ubuntu you will need to install FreeType and libpng
$ sudo apt install libfreetype6 libfreetype6-dev
$ sudo apt install libpng16-16 libpng-dev
- My FreeType version is
2.8.1-2ubuntu2although, at the time of writing, the most recent version isFreeType-2.10.1which will work as well - My libpng version
(1.6.34-1ubuntu0.18.04.2)
The console renderer
Create your C file (main.c in my case)
#include <stdio.h>

int main() {
  printf("Hello, world\n");
  return 0;
}
$ clang -Wall -Werror -o main main.c
$ ./main
Hello, world
Include the FreeType libraries
To find the include path (i.e. the directories your compiler traverses when searching for the files you #include) for FreeType run:
$ pkg-config --cflags freetype2
-I/usr/include/freetype2 -I/usr/include/libpng16
This line -I/usr/include/freetype2 -I/usr/include/libpng16 contains the compilation flags needed to include FreeType in the C program
#include <stdio.h>

#include <freetype2/ft2build.h>
#include FT_FREETYPE_H

int main() {
  printf("Hello, world\n");
  return 0;
}
$ clang -I/usr/include/freetype2 \
        -I/usr/include/libpng16  \
        -Wall -Werror            \
        -o main                  \
         main.c
$ ./main
Hello, world
Print FreeType’s version
Inside main() initialize FreeType using FT_Init_FreeType(&ft) and check for errors (FreeType functions return 0 on success).
(From now on all the functions I will use come from the FreeType API Reference).
FT_Library ft;
FT_Error err = FT_Init_FreeType(&ft);
if (err != 0) {
  printf("Failed to initialize FreeType\n");
  exit(EXIT_FAILURE);
}
Then using FT_Library_Version obtain the version.
FT_Int major, minor, patch;
FT_Library_Version(ft, &major, &minor, &patch);
printf("FreeType's version is %d.%d.%d\n", major, minor, patch);
If we compile it using the last command we will have a linker error:
/tmp/main-d41304.o: In function `main':
main.c:(.text+0x14): undefined reference to `FT_Init_FreeType'
main.c:(.text+0x54): undefined reference to `FT_Library_Version'
clang: error: linker command failed with exit code 1 (use -v to see invocation)
To fix it add -lfreetype
$ clang -I/usr/include/freetype2 \
        -I/usr/include/libpng16  \
        -Wall -Werror            \
        -o main                  \
        -lfreetype               \
         main.c
$ ./main
FreeType's version is 2.8.1
Loading a font face
The first step to render a character is to load the font file. I am using ubuntu mono.
To understand the exact difference between face, family and font refer to the FreeType Docs.
The third argument is called the face index, which was created to allow font creators to embed several faces in a single font size. Because every font has at least 1 face in it 0 will always work and will select the first one.
FT_Face face;
err = FT_New_Face(ft, "./UbuntuMono.ttf", 0, &face);
if (err != 0) {
  printf("Failed to load face\n");
  exit(EXIT_FAILURE);
}
Setting the face’s pixel size
With this instruction we tell FreeType our desired width and height for the rendered characters.
We can omit the width by passing 0, FreeType will interpret this as: “same as the other”, in this case 32px. This can be used to render a character with e.g. 10px width and 16px height.
This operation can fail on a fixed-size face, which we will encounter when talking about emojis.
err = FT_Set_Pixel_Sizes(face, 0, 32);
if (err != 0) {
  printf("Failed to set pixel size\n");
  exit(EXIT_FAILURE);
}
Getting the character’s index
First of all let’s go back to the FreeType docs and establish a naming convention.
A character is not the same thing as a glyph. A character is what you have in your char, a glyph is an image which is in some way relater to that character.
This relation is quite complex because a char can correspond to many glyphs: i.e. accents. A glyph can correspond to many chars: i.e. ligatures where -> is represented as a single image.
To obtain the index of the glyph corresponding to a character we use FT_Get_Char_Index.
This, as you can imagine, only allows one-to-one mapping between characters and glyphs.
We will solve this in a future part by using the HarfBuzz library.
FT_UInt glyph_index = FT_Get_Char_Index(face, 'a');
Loading a glyph from the face
Having obtained the glyph_index we can load the corresponding glyph from our face.
In a future part we will discuss in depth about the various load flags and how they allow using features like hinting and bitmap fonts.
FT_Int32 load_flags = FT_LOAD_DEFAULT;
err = FT_Load_Glyph(face, glyph_index, load_flags);
if (err != 0) {
  printf("Failed to load glyph\n");
  exit(EXIT_FAILURE);
}
Rendering the glyph in a glyph slot
At this point we can finally render the our glyph into a glyph slot, contained in face->glyph.
We will discuss the render flags in the future too because they allow using LCD (or Subpixel) Rendering and Grayscale Antialiasing.
FT_Int32 render_flags = FT_RENDER_MODE_NORMAL;
err = FT_Render_Glyph(face->glyph, render_flags);
if (err != 0) {
  printf("Failed to render the glyph\n");
  exit(EXIT_FAILURE);
}
Printing the glyph to the console
The bitmap of the rendered glyph can be accessed with face->glyph->bitmap.buffer and is represented as an unsigned char array, therefore
its values are between 0 and 255.
The buffer is returned as a 1D array but represents a 2D image.
To access the i-th row and j-th column of it we use column * row_width + row, as seen in bitmap.buffer[i * face->glyph->bitmap.pitch + j].
You can see that we used bitmap.width in the for loop and bitmap.pitch in the array access, this is because each row of pixels is bitmap.width wide
but the buffer has a “width” of bitmap.pitch.

In the following code each row and column is iterated and depending on the pixel brightness a different symbol is drawn.
for (size_t i = 0; i < face->glyph->bitmap.rows; i++) {
  for (size_t j = 0; j < face->glyph->bitmap.width; j++) {
    unsigned char pixel_brightness =
        face->glyph->bitmap.buffer[i * face->glyph->bitmap.pitch + j];

    if (pixel_brightness > 169) {
      printf("*");
    } else if (pixel_brightness > 84) {
      printf(".");
    } else {
      printf(" ");
    }
  }
  printf("\n");
}
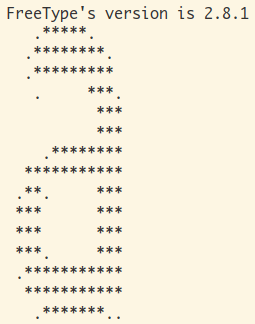
The console output.
$ clang -I/usr/include/freetype2 \
        -I/usr/include/libpng16  \
        -Wall -Werror            \
        -o main                  \
        -lfreetype               \
         main.c && ./main
FreeType's version is 2.8.1
   .*****.
  .********.
  .*********
   .     ***.
          ***
          ***
    .********
  ***********
 .**.     ***
 ***      ***
 ***      ***
 ***.     ***
 .***********
  ***********
   .*******..
You can find the complete code here.
Conclusion
We have built a basic console character renderer. This example can, and will, be extended to render a character in an OpenGL texure, to support emojis, subpixel rendering, ligatures and much much more. In the the next part we will talk about Grayscale vs LCD antialiasing and their pros and cons.
See you soon😁🖐️.